SCCM 2012 R2 - Updating and configuring HP ProBook 6470b/6570b BIOS in a task sequence - Part 1
29 Jul 2014Continuing my recent foray into System Center Configuration Manager (SCCM) 2012 R2, I’ve been working on getting a task sequence to automatically update and configure the BIOS for our HP ProBook laptops. I’ve started with our most popular models, the HP ProBook 6470b/6570b. Fortunately, apart from their screen size, they are almost completely identical, which makes the job a lot easier.
Prerequisites
The first thing we’ll need to do is take care of the prerequisites and the downloads, so we’ve got all the files required to complete the work.
Files Needed
- The HO ProBook 6x70b BIOS is available here and should work with both the 6470b and the 6570b.
- HP BIOS Configuration Utility (HP BCU). I’m using version 3.0.13.1, there could be changes if you are using something newer.
- HP System Software Manager (HP SSM). Again, I’m using version 3.1.10.1, so be aware.
First of all, we’ll get the BIOS configuration working and we’ll do the BIOS update second. This may sound backwards, but it simplifies things if you will be imaging a mix of factory fresh and pre-provisioned machines. This is because we’ll be setting the BIOS password in the configuration stage and putting the logic there to deal with whether the machine already has a password set. This means when we come to the BIOS flash, we can just run the tool in a straightforward way.
NOTE: If you’re not using a BIOS password, you can do this in any order, but I highly recommend you secure things properly. The last thing your service desk needs is someone changing the boot order and installing their own OS or something, because users.
Encrypting your BIOS password
Extract the HP System Software Manager download and install it. You’ll then have to browse to either “%ProgramFiles(x86)%\Hewlett-Packard\SystemSoftwareManager”, or “%ProgramFiles%\Hewlett-Packard\SystemSoftwareManager” to find “ssm.cab”. The files you need are in here:
- “HPBIOSUPDREC.exe” (BIOS updater tool we may need later)
- “HpqPswd.exe” (BIOS password encryption tool)
NOTE: For the ProBook 6x70b, we’ll be using the hpqFlash.exe utility that we’ll get later, as that’s the one that works with these models. If you are using newer models (like the EliteBook 840G1), you will need to use HPBIOSUPDREC.exe.
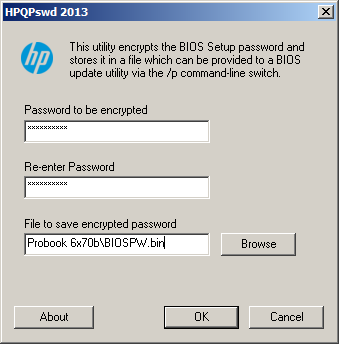
If you run HpqPswd.exe, it will ask you for the BIOS password you wish to encrypt into a “.bin” file. Enter your BIOS password, then save the file somewhere useful, as this we will use this later to as the credential for configuring/updating the BIOS.
Preparing the BIOS configuration
Now, you’ll need a test machine of the right type to get a BIOS configuration from. You could in theory specify the configuration file from scratch, but that would take a while. The easiest way to do it is to set up a computer how you want it, export the BIOS config, tweak it to suit, then deploy!
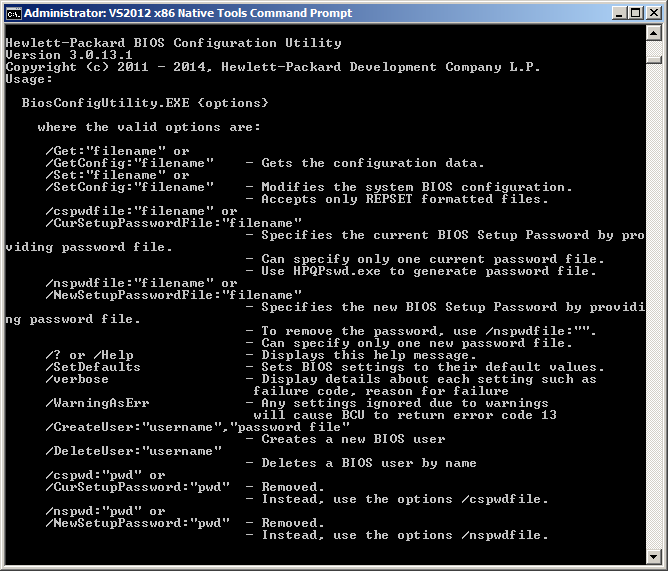
To start this process, you’ll need to install the HP BIOS configuration utility, then browse to “%ProgramFiles(x86)%\Hewlett-Packard\BIOS Configuration Utility”, or “%ProgramFiles%\Hewlett-Packard\BIOS Configuration Utility” and get the following files:
- “BiosConfigUtility.exe” (BIOS configuration tool, for x86)- - “BiosConfigUtility64.exe” (BIOS configuration tool, for x64)
NOTE: Both of these files seem to work fine on x64 build of Windows 7, so I’m not too sure why there is a specific x64 version. The “BIOS Configuration Utility User Guide.pdf” is also quite useful, so you may want to grab that too.
If you take BiosConfigUtility and run it on the machine you’ve configured, you can get it to export the current configuration to file, using “BiosConfigUtility.exe /get:”ProBook 6x70b\BIOSConfig.cfg””
The file format for the BIOS configuration isn’t particularly great, with tab indented options, but with the export, the current settings are all selected for you, with an asterisk (*) denoting the active option.
Here’s an example of part of my config file:
Data Execution Prevention
    Disable
    *Enable
SATA Device Mode
    IDE
    *AHCI
Reset of TPM from OS
    Disable
    *Enable
OS Management of TPM
    Disable
    *Enable
Activate TPM On Next Boot
    Disable
    *Enable
TPM Device
    Hidden
    *Available
TPM Activation Policy
    F1 to Boot
    Allow user to reject
    *No prompts
You can tweak the file however you need, It seems the general recommendation is to remove anything you’re not actively going to set, as this provides a more concise config file and makes it easier to track down issues.
In the next part, I’ll cover setting up the SCCM side of things now we are nearly ready to deploy the new settings and upgrade the BIOS. Read on to Part 2!